HTB Challenge RE ColossalBreach Writeup
HTB Challenge RE ColossalBreach Writeup
Note: This is not a full writeup on completing the challenge, but more of a writeup of reversing the challenge binary itself.
Basic checks
 Based on Google search, the .ko file seems to be a kernel object file, so we are looking at a kernel module here.
From this LinkedIn Post (https://www.linkedin.com/pulse/dissecting-linux-kernel-object-ko-file-structure-sections-david-zhu-srlec/), the .ko file is basically an ELF file but with kernel-specific sections in it. The 2 interesting sections would be .init.text and .exit.text section, which are codes that will run during module initialization and module cleanup respectively.
So the first place to check would be the .init.text function. Since the binary is not stripped, the corresponding function name is spy_init.
Most of the useful code starts from line 18 to line 31. Based on line 19, 20 and 23, the module seems to have created a file when initialized. The debugfs_create_dir() function creates a directory in the debugfs filesystem (https://www.systutorials.com/docs/linux/man/9-debugfs_create_dir/). The root directory of debugfs should be /sys/kernel/debug (https://docs.kernel.org/filesystems/debugfs.html). 
As for the debugfs_create_file() function, it creates a file in the debugfs system (https://www.chiark.greenend.org.uk/doc/linux-doc-3.16/html/filesystems/API-debugfs-create-file.html). The first parameter is the file name, and the third parameter is a dentry pointer to the parent directory. In this case, the parent directory (pdVar1) was created on line 19, which is the “spyyy” directory. As for the filename, we can simply inspect the referenced global data, which stores the string “keys”. 
From here, we know that a file was created at /sys/kernel/debug/spyyy/keys. And for the purpose of getting the flag, line 26 prints out a message when the module is initialized. The message can be traced back to the global data &DAT_00100c71. 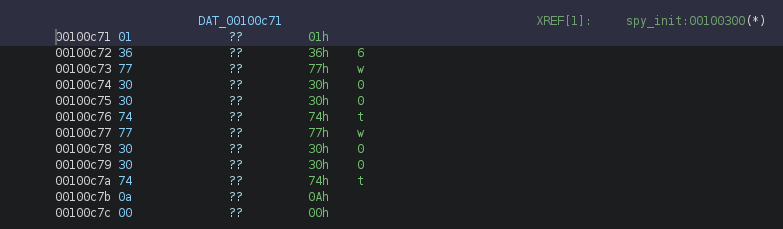
Next we’ll look at the register_keyboard_notifier() function on line 25. This function is used to register a keyboard event handler function (https://www.kernel.org/doc/html/v5.6/input/notifier.html#). A notifier_block structure should be passed to the function, which will have a notifier chain containing a list of callback functions with type notifier_fn_t.
struct notifier_block {
	notifier_fn_t notifier_call;
	struct notifier_block __rcu *next;
	int priority;
};
On line 25, the address of the global variable spy_blk was passed. Tracing the spy_blk variable, we can see that Ghidra shows the notifier_block structure, with the first parameter pointing to spy_cb. 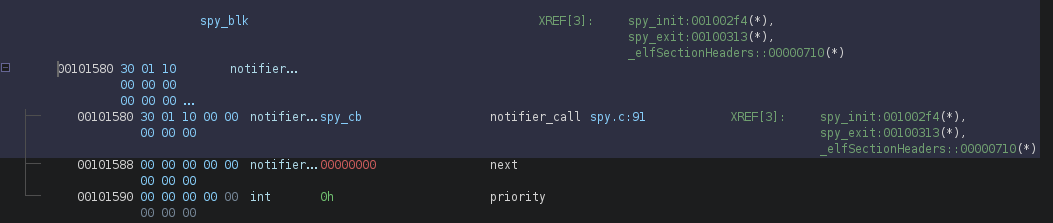
So the initialization steps of the kernel module are:
- Create a file under
/sys/kernel/debug/spyyy/keys - Registers the
spy_cbas the callback function to handle keyboard events
Now looking at the spy_cb function. On line 41, a function named keycode_to_string was called. Judging by the function name, this seems to be converting a keycode (probably resulted from a keyboard press) into a ASCII character. 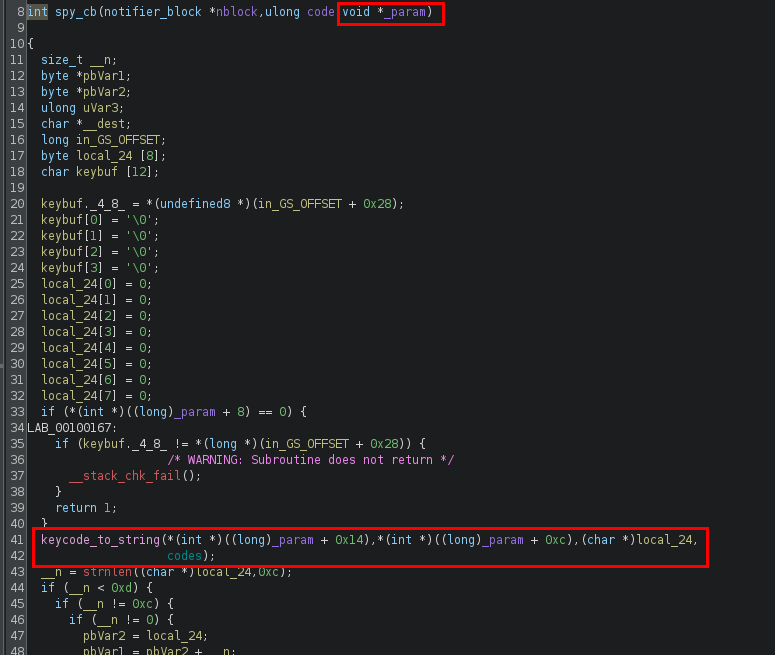
Values in the _param variable was passed to keycode_to_string. Here the _param follows the keyboard_notifier_param structure as shown below. (Reference: https://github.com/torvalds/linux/blob/master/include/linux/keyboard.h)
struct keyboard_notifier_param{
	struct vc_data *vc; // VC on which the keyboard press was done
	int down; // Pressure of the key?
	int shift; // Current shift mask
	int ledstate; // Current led state
	unsigned int value; // keycode, unicode value or keysym
}
So based on the structure and the variable size, we can tell which parameters were accessed based on the offset from the structure address. For example, the vc_data *vc variable is at offset 0, which equals to _param + 0. The down variable will be at offset 8 (since vc_data *vc is a pointer, it will have a size of 8 bytes in a x64 ELF), which equals to _param + 8. The offsets are listed below.
struct keyboard_notifier_param{
	struct vc_data *vc; // _param + 0x0
	int down; // _param + 0x8
	int shift; // _param + 0xc
	int ledstate; // _param + 0x10
	unsigned int value; // _param + 0x14
}
So the first parameter passed is the integer value of the keycode, while the second parameter is the shift mask. The shift mask indicates what is the current modifier state. Modifiers includes the Shift, Ctrl and Alt keys.
The keycode_to_string indeed maps a keycode (an event code when a key is pressed) into a ASCII character, which is really all you need to know to continue the process. But just for learning purposes, I like to have a look at the function and try to analyze it.
The function actually maps the provided keycode differently based on the last parameter provided (int type). Line 24 to 32 seems to be mapping the keycode using the us_keymap, which is an array containing the ASCII characters. But line 12 to line 21 seem to just directly put the keycode value into the buffer without any mapping. This suggests that the function can actually either map the keycode (event code) to a character, or just directly convert an integer to a character. The latter is probably just for development purposes. 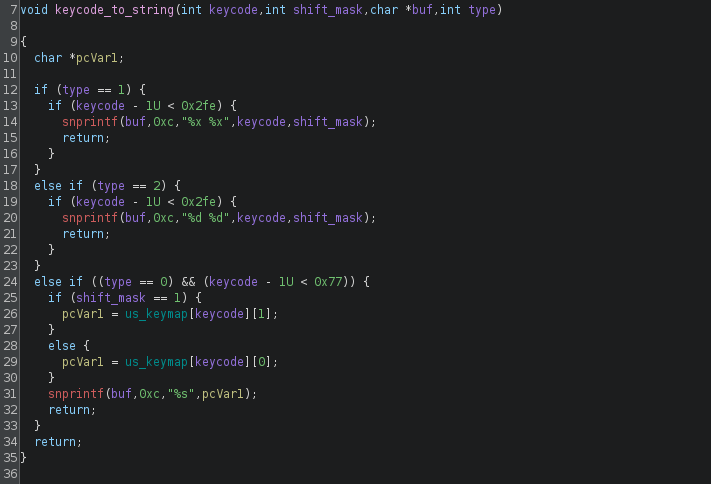
Back to spy_cb, the buffer local_24 (which contained the ASCII character of the key press) is modified with an XOR operation on line 50. So line 43 to 52 basically does an XOR (with value 0x19) on every ASCII character that was mapped.
Then from line 53 to 60, the ASCII character (in local_24) is written to the global variable keys_buf with offset buf_pos. So the variable keys_buf will be storing all the key press that was recorded by the module. 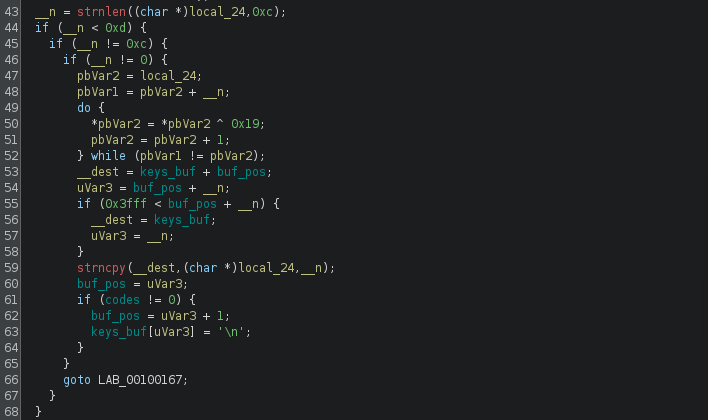
From here, I wasn’t able to find the exact code where the keys_buf was written to the file created during initialization. There is a function keys_read which reads the keys_buf into another buffer, but that function doesn’t seem to be called within the module.
Nevertheless, there is actually a log file provided along with the kernel module. This is a log file that was written by the kernel module. 
By doing a simple XOR on these characters, we can see that it is the recorded keypress of someone operating on a Linux OS. 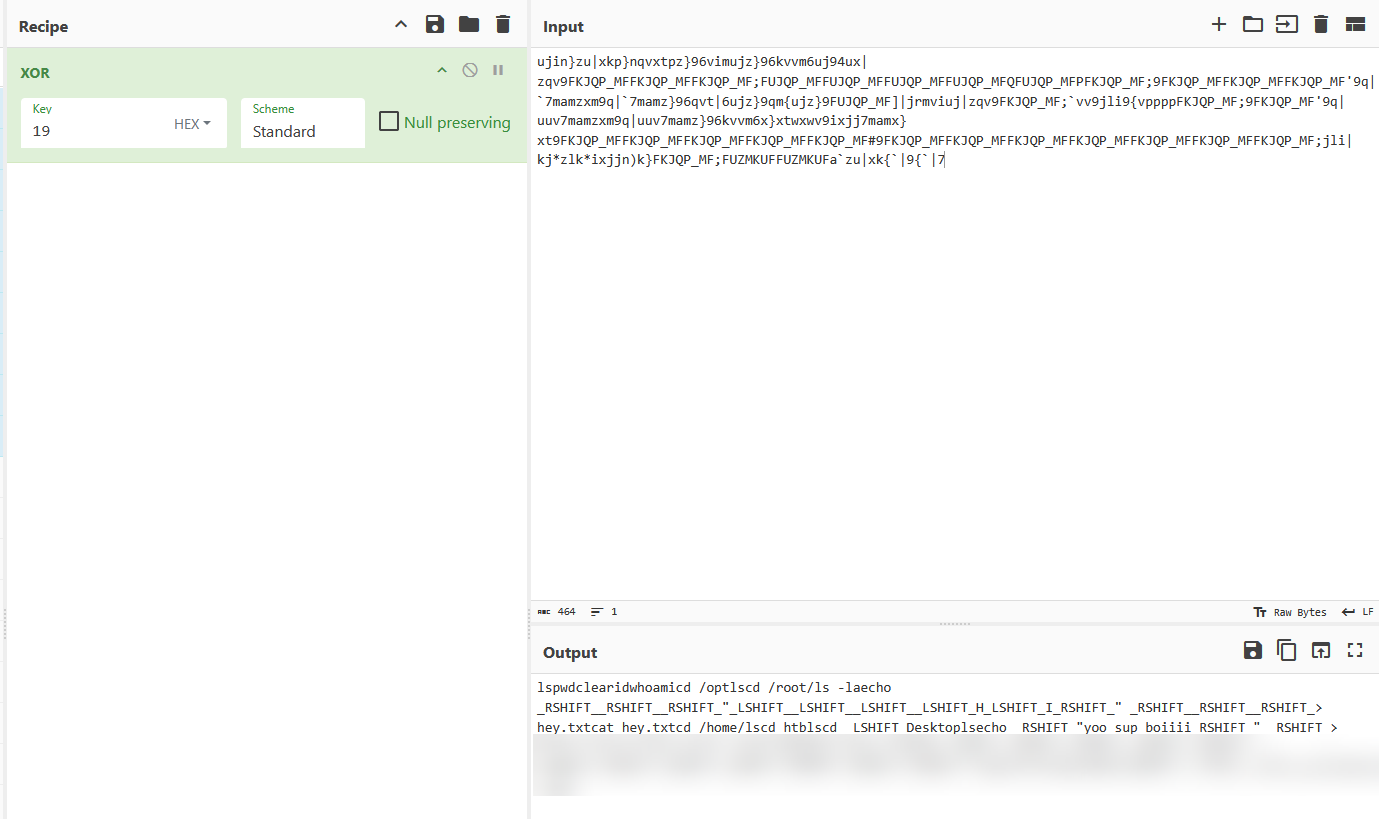
To obtain the flag, you’ll need to spin up an instance on the HTB challenge page and connect to it with netcat. From there, you’ll need to answer some questions to get the final flag. Most of the answers can be found during the reversing process of the binary.